The problems on my HP Spectre (death by update) have forced me back onto my toshiba laptop as the first place I review my photos, cull the duds and perhaps do some preliminary evaluation of what might be worthwhile to further process. I had got used to using AfterShot pro, and in particularly had found the built in plug-in perfectly clear a wonderful little short cut to see what was possible by refining RAW files. To start I would have to try and reproduce what perfectly clear had done. Then I realized is I exported the perfectly clear changes to a 16 bit .tiff file I would have the perfectly clear image as a starting point and still access to the extra colour depth and dynamic range. Also on the HP Spectre I had got to using lightroom much more, particular as the platform to run other plug-ins like OnOne and Nik Software. Both of which work well with .tiff files. The option of running both Aftershot and then lightroom on the laptop was getting a tediously slow.
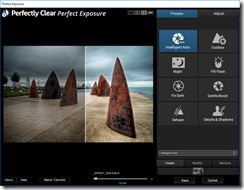
 Back on the slower laptop I still like to look at potential good photos in perfect clear. A couple of weeks ago I received an offer with a Perfectly Clear newsletter to download (for free) the Prefect Exposure plug-ins tools (for lightroom and photoshop) so I jumped at the opportunity. The lightroom style plug in is still an extra step inside Lightroom but it is wonderful time saver for a lot of the manual exposure slider tweaking and it can deliver the .tiff file back into the lightroom library. Just Perfect for further lightroom, Nik or OnOne adjustments, staying with the .tiff format of course. I strenuously avoid fixed workflows (I think they are anti-creative) but I know starting with perfectly clear can avoid a lot of tedium, even if I don’t use all of the changes it recommends. I will have some knowledge of a better place to start
If you haven’t looked at the Perfectly Clear plug-ins yet they are probably going to be the best things you can add to lightroom.
No comments:
Post a Comment